 Custom Command
Setting Up Custom Bot
This guide is for Tier 3+ users. You only need to do this once per server.
Creating Bot
Head over to the Discord Developer Portal and login with your Discord account.
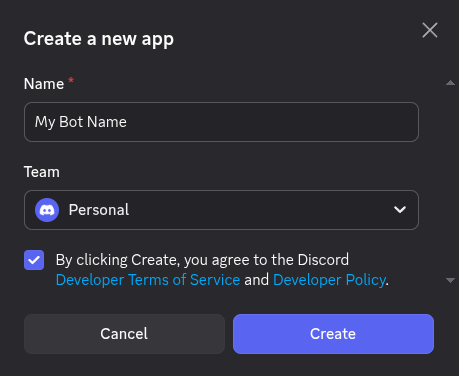
Click the New Application button and give your bot a name. This will be visible to your server members, so choose something that fits your community.
Configuring Bot
On the left sidebar, click the Bot tab. This is where you'll customize your bot's appearance and behavior.
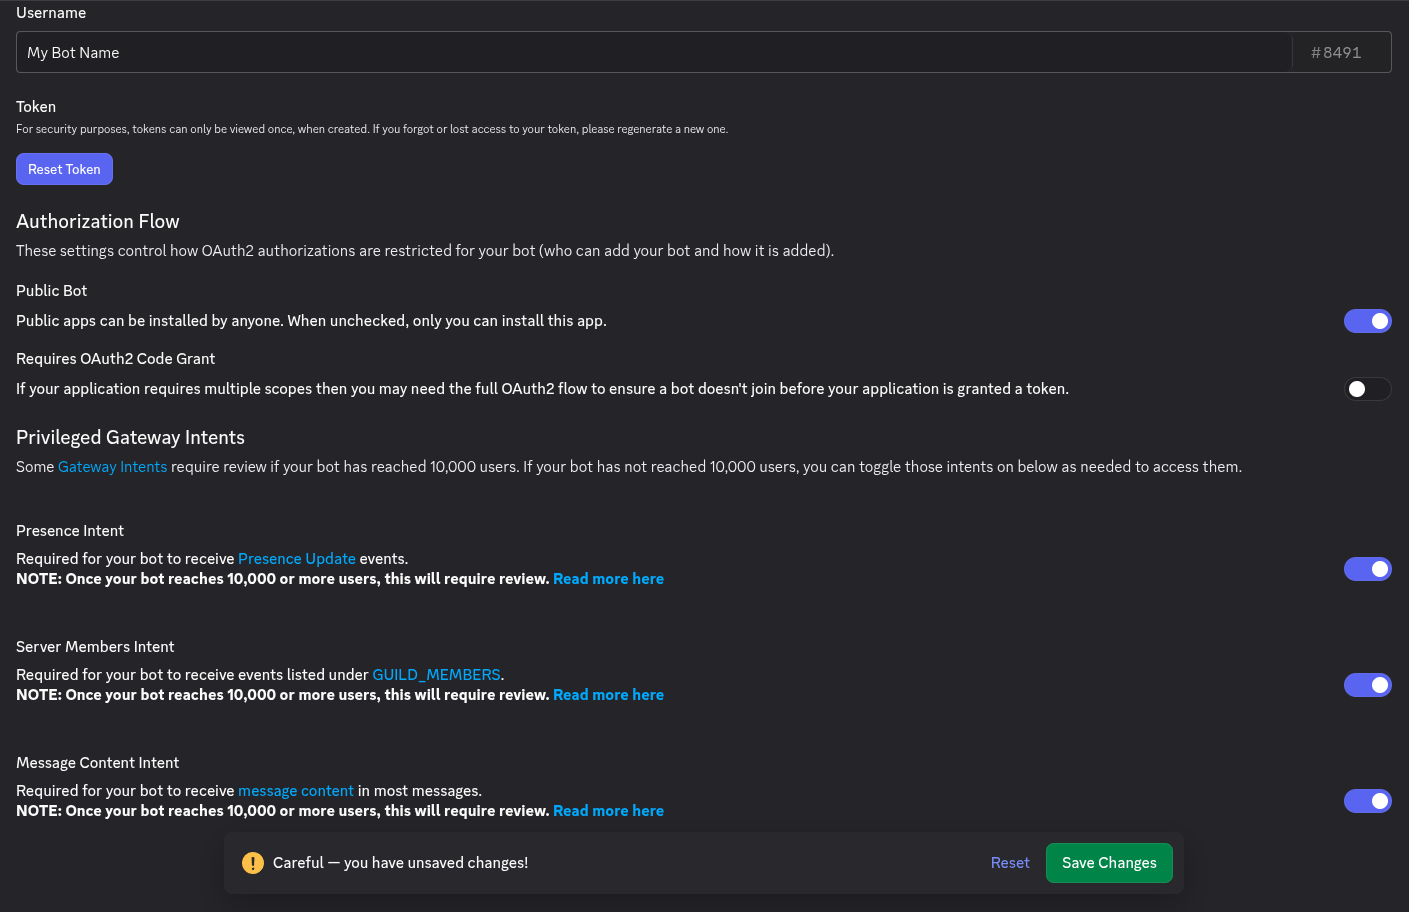
If you want, upload a profile picture and set a display name. Then scroll down and enable all three Privileged Gateway Intents. These are required for the bot to function properly.
In case your server has over 10K members, you will have to send a request to Discord for these intents.
Make sure to toggle off Public Bot so noone else can invite it, and click Save Changes.
Getting Bot Token
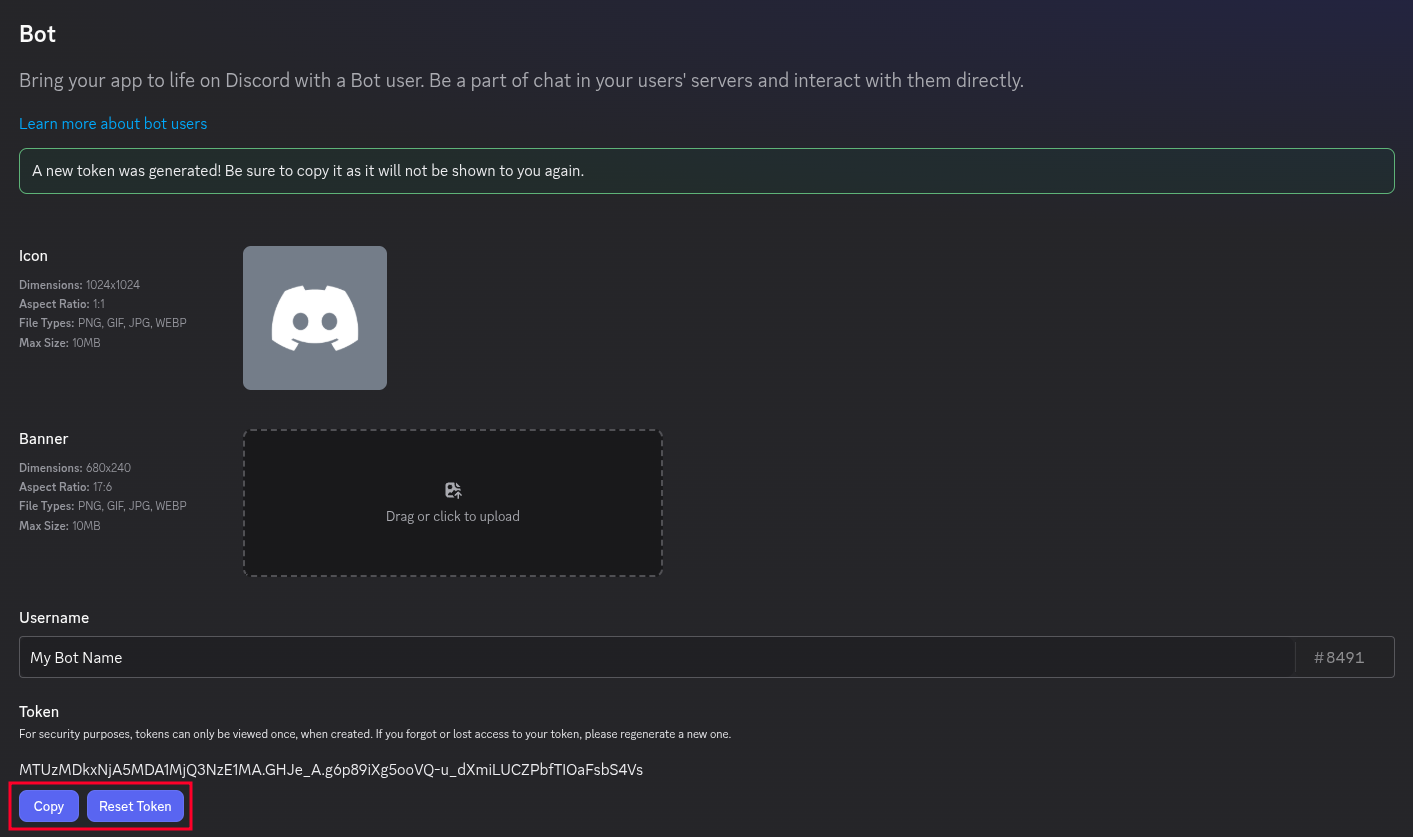
Click the Reset Token button. Discord will generate a fresh token for you. Then click the copy button and head over to the next step.
Sharing Token
Anyone with this token can control your bot, so never share it with anyone.
Dashboard Settings
Now go to our dashboard and select the server where you have premium access.
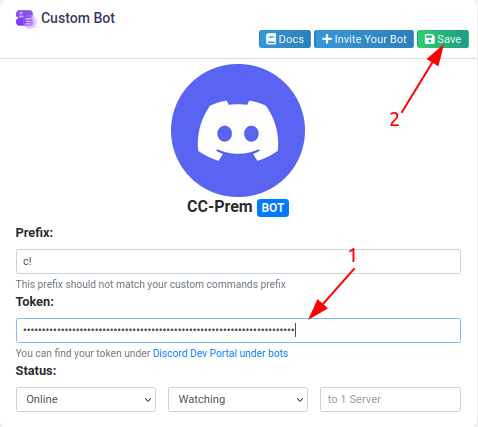
Navigate to the premium page, paste your bot token into the text field, and choose your prefix. After saving, the system will start your bot immediately.
Inviting Bot
Once the bot is running, click the Invite Your Bot button. You'll be redirected to Discord's authorization screen where you can pick the server you want to add it to.
Kicking Free Bot
Removing the Free bot from your server will result in you loosing access to the dashboard.